If you are just beginning to explore the wonderful world of hiking, this guide will provide invaluable information on how to stay safe. With so many people taking up the activity in recent years, it is important that hikers know how to protect themselves while they enjoy nature. We’ll start with some important safety gear and then get into the specific rules for both day hikes and overnight backpacking trips.
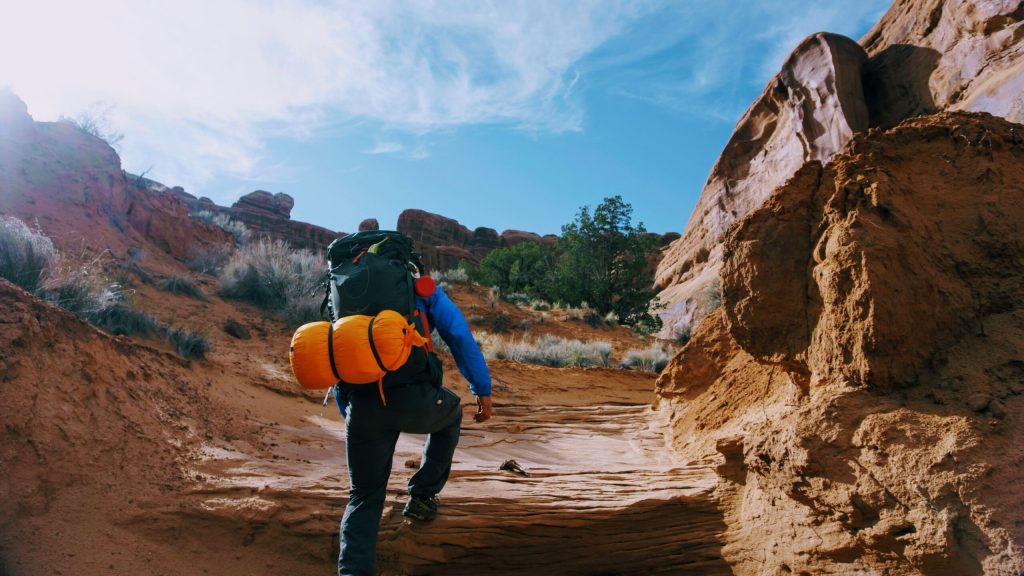
Table of Contents
What Safety Gear do I Need?
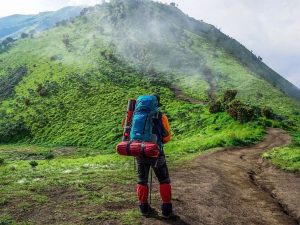
There are many things that go into preparing for a hike; however, one of the most important is making sure your safety needs are met. This means investing in good boots and clothing items designed specifically for hiking.
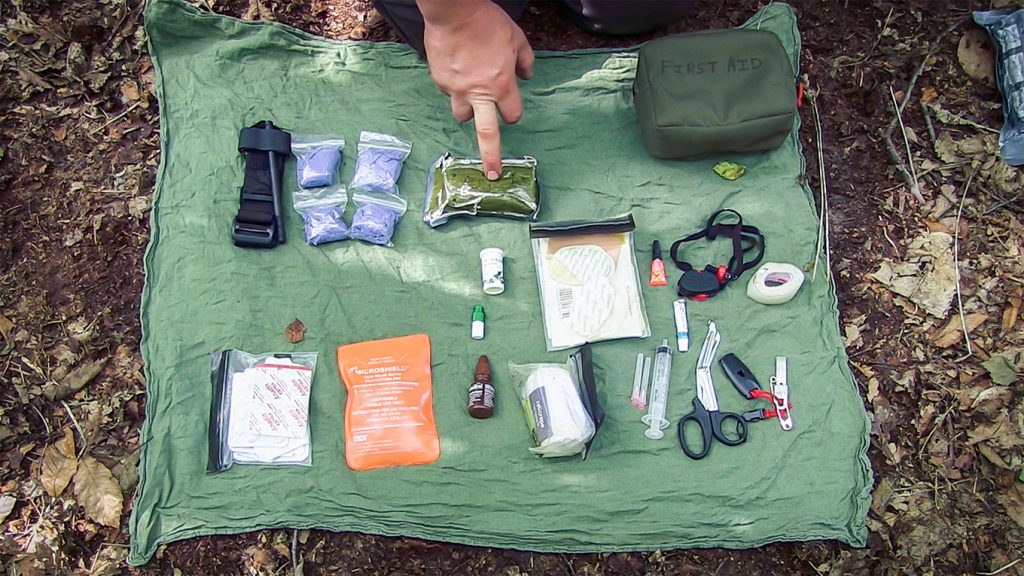
Next, it’s important that all hikers carry a first aid kit in their backpack at all times while hiking. You can purchase one at any sporting goods store or online retailer. This kit should include gauze pads for cleaning wounds, band-aids of various sizes, antiseptic ointment, and pain relief medication.
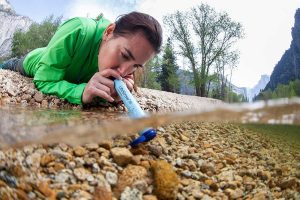
You should also carry a fully charged cell phone with your at all times while hiking. You will never know when you might need to make an emergency call or send a text message for help. It’s also smart to invest in a GPS tracking device that can be attached to the outside of your backpack. That way, if you do get lost, rescuers will be able to quickly find your location.
Finally, hikers should bring their own bottled water and a small snack with them on each hike. It’s always better to have something in case of an emergency rather than nothing at all
Day Hikes vs Overnight Backpacking
The rules for staying safe on a day hike and overnight backpacking trip are different. Let’s talk about each one separately to make sure you know what you need to do!
Day Hikes
- On short hikes, it isn’t as important that hikers bring along some of the more heavy-duty safety equipment such as a GPS device or first aid kit. However, it is important to remember the following tips for day hikes:
- Hike with a friend if possible. If you don’t have any friends that are interested in hiking, then meet up with another group or organization that does regularly hike on weekends. This way you won’t be alone and will always have someone around should you get hurt or lost.
- Hike at a time of day when the sun is high in the sky and there will be plenty of other people around to help if you need it. This means avoiding hiking near dusk or dawn unless you absolutely have to (for example, because your work schedule requires that you leave early).
- Bring along some type of communication device. This could be a cell phone or even an electronic locator beacon (ELB). An ELB is like the GPS tracking devise mentioned above, but it works on satellites instead of landlines and can pinpoint your location within feet (instead of meters) if necessary.
Overnight Backpacking
On overnight backpacking trips, it is absolutely essential that hikers bring along a few items. These include:
- A GPS tracking device or ELB (see above).
- A fully charged cell phone with you at all times.
- A battery-powered bank
- Extra food and water in case of emergencies (be sure to take into account the weight of these items when you pack your backpack).
- An extra pair of clothing just in case it rains or gets colder than you anticipated. This way, if the original set gets soaked or too warm, then at least you have a backup set to wear.
- Do NOT bring along any alcohol or drugs on an overnight trip! These are dangerous for numerous reasons, so don’t even think about it!
- Don’t push yourself if you don’t feel safe or like your surroundings. There is no shame in turning back and trying again another day!
Note: Don’t let yourself be pressured into doing something that you’re not comfortable with. If someone tries to convince you otherwise, then just say “no thanks” and hike on your own way.
Hiking Difficulty Levels
Hiking difficulty levels are all about how much of a struggle it is to hike the trail. You’ll find that different trails will be rated differently depending on who was doing the rating and what their specific needs were at the time they hiked. Therefore, if you’re planning on hiking with children or seniors then pay attention to these ratings as they will be different than those that were done by young adults.
Easy – This is the easiest and most suitable level of trial for beginners, children, and seniors. These trails will likely have wide paths with gentle inclines if any at all (as opposed to steep hills). You should also expect these trails to have frequent rest stops.
Moderate – These trails are best suited for people who are comfortable hiking on their own without the help of others. The paths will be wide, but they may also include some inclines and declines as well as maybe a few switchbacks here or there (turns that make it easier to go up/downhills by doing wide zigzags instead of straight paths). These trails should also have frequent rest stops.
Difficult – The most experienced hikers will be the ones who are best suited for these types of hikes. They’ll likely not be too narrow (although some may) and they definitely won’t include any resting spots! You better make sure that you’re fit, full of energy, and ready to go when you reach the top!
Note: If at any time while hiking on a difficult trail that it feels like your heart is going to burst out of your chest then turn back immediately. You should only be doing strenuous activities if your body can handle them (which will depend on your fitness level, etc.)!
Very Difficult – The only people who should ever attempt to go on a very difficult trail are those that have extensive experience in hiking and understand what their limits are. These trails will be extremely narrow, steep (and likely slippery due to rain), and windy.
Extreme – These trails are not for the faint of heart. In fact, they’re only suitable for people who have been hiking on difficult trails almost every day and can easily handle their own without any help from others. Keep in mind that these types of hikes will likely be even more strenuous than difficult ones because they’ll also be more narrow and will include even steeper inclines/declines.
Note: If you’re not an experienced hiker then do yourself (and your heart) a favor by skipping these types of trails! Not only are they unsuitable for beginners, but they can easily lead to death if someone isn’t careful enough.

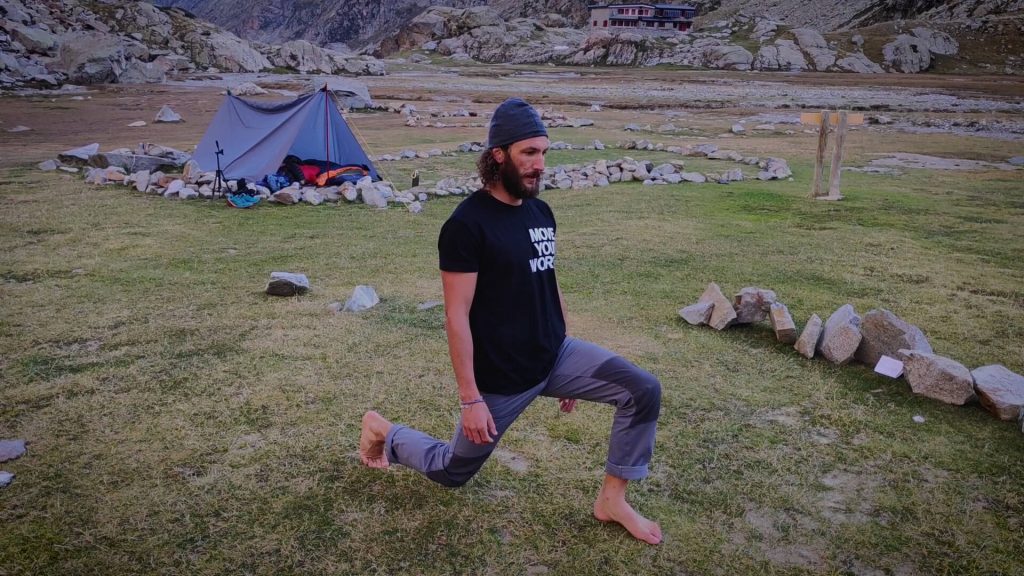
Warm-up Hiking Exercises
Before going hiking, it’s important to do some warm-up exercises. These can be both physical and mental in order to help you feel prepared for the hike ahead. Here are a few examples of these types of exercises that you might want to try out before starting your trek:
- Walk-up/downstairs – This is great for working your legs.
- Walk on the treadmill – This is good for warming up your muscles and getting you ready to move at faster speeds.
- Do some lunges or squats – These are great for preparing your lower body before an intense hike.
- Hang from monkey bars/do pull-ups & dips – This will help strengthen your back and arms.
- Stretch – This will loosen up your muscles which you’ll need in order to be able to walk for long periods of time.
Note: If you’re not sure how to do these exercises, ask a personal trainer or someone who knows about exercise routines
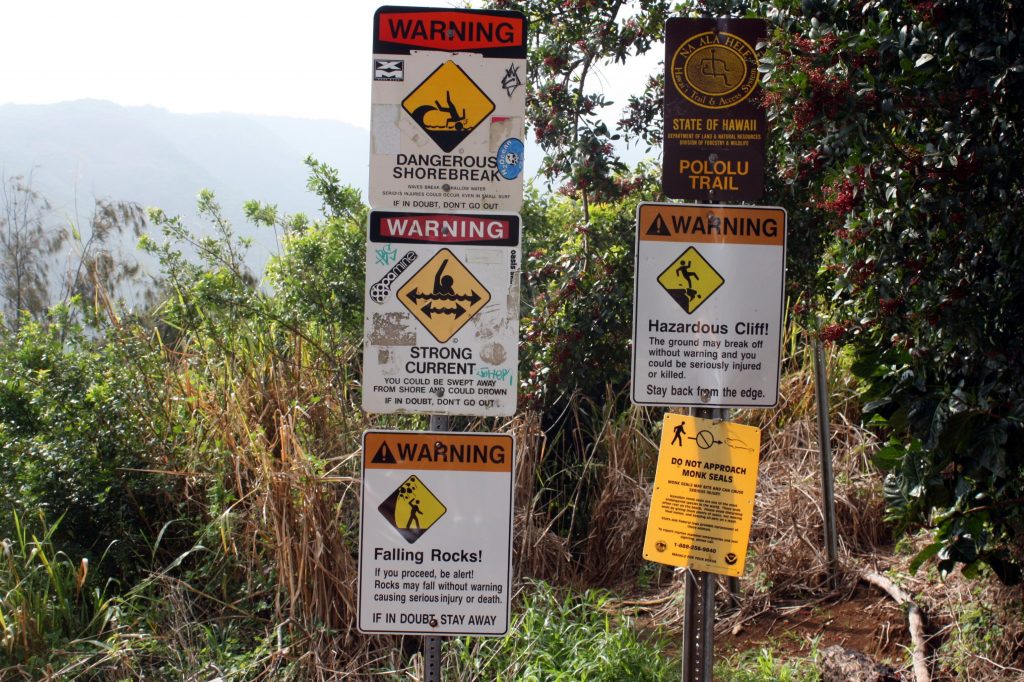
Hiking Safety Tips
Just like any other type of outdoor activity, there are risks involved when you hike. However, as long as you follow these safety tips then those risks will be minimal and the chances that something bad happens to your while hiking will stay relatively small! Here’s how to do just that:
- Stay hydrated – Drink lots of water throughout the day and bring some along with you when hiking.
- Keep your energy up – Bring snacks (granola bars, trail mix) to help give you a boost in energy while hiking. They’ll also prevent you from getting too hungry which can be dangerous for anyone! Note: Be careful not to eat anything that will upset your stomach.
- Stay safe – Make sure that you always have a map, phone, or GPS device with you to help let people know where you are if anything were to ever happen! Note: Do not rely on just one of these things as they can easily break at any moment without prior notice which leaves you stranded!
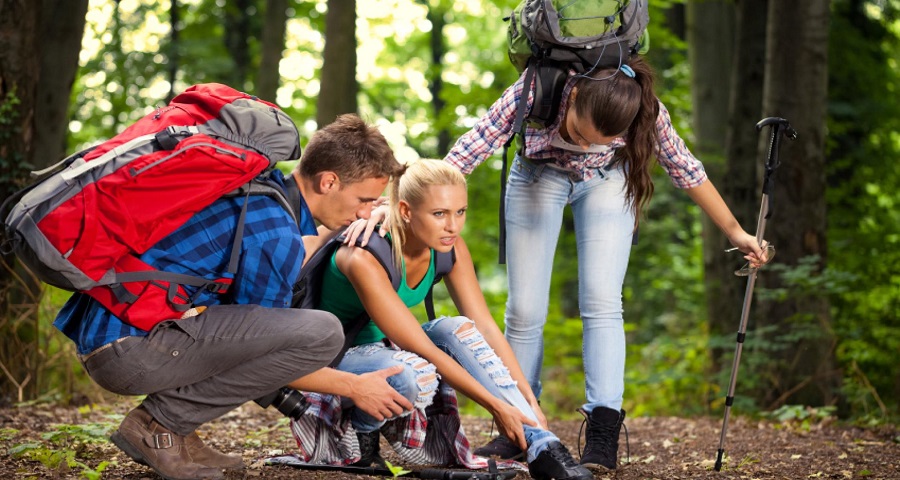
Hiking Common Injuries
Hiking is fun yet it can also be dangerous if you don’t take the necessary precautions. As such, it’s important to know what some of the common hiking injuries are so you can be aware of if/when they happened. Here are just a few examples:
- Blisters – These painful bumps develop on your feet when the skin gets rubbed off due to friction caused by the constant rubbing of your shoes against them.
- Blowout knee – This is when the patella (knee cap) slips out of its groove leading to intense pain during movement.
Note: To help prevent this injury, it’s best to do some stretches before hiking to help loosen up your muscles.
- Headaches – These are one of the most common problems for hikers because walking uphill puts a lot of pressure on your neck and back which can lead to severe headaches
Note: To treat these types of headaches, make sure that you bring along some pain reliever in case they get too bad.
- Heatstroke – This occurs when the body overheats which leads to possible dehydration and /or heat exhaustion.
- Hypothermia – This occurs when a person’s body temperature drops below 95 degrees Fahrenheit which can lead to death if it’s not treated.
- Stress Fracture – This injury occurs when the bone cracks due to overuse.
- Cuts/Bruises – There’s always a risk that you’ll get cuts or bruises while hiking since it involves walking on sharp terrain (rocks, branches).
Note: The chance of this happening is increased if you’re not wearing any sort of protective gear.
- Muscle cramps – These painful spasms usually happen in your calves, feet or thighs and they’re a result of an imbalance between the salts inside your body and the ones that are being lost through sweat.
- Twisted/sprained ankle – This is when you twist or sprain your ankle which can cause immense pain as well as possible swelling.
Note: To help treat this, make sure that you apply ice to the area and elevate it above heart level if at all possible
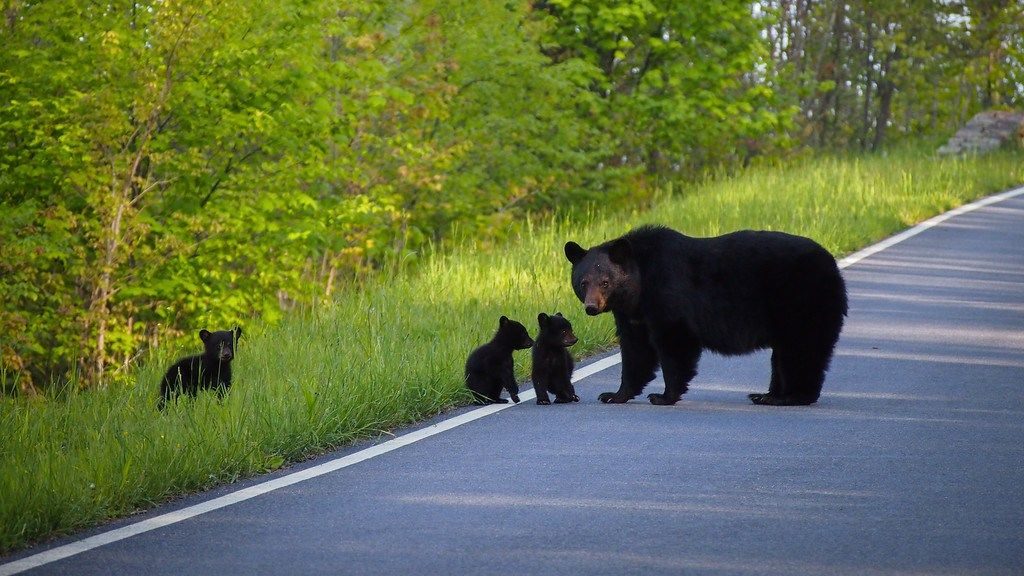
Be Aware of Wildlife and Take Necessary Safety Precautions
Even if you’re in a seemingly peaceful area, there’s always the chance that you’ll run into some wildlife. As such, it’s important to know how to behave around them so you don’t get hurt! Here’s how to do just that:
If you see a bear – Make sure that it can’t smell any food on you and slowly back away.
If you see a snake – Do not approach it and if possible, try to take a picture of it from afar. If it comes towards you, make loud noises and try to scare it away.
Note: If you’re bitten, seek medical attention immediately!
If you see an animal eating another dead/injured creature – Do not get near them as they can become very hostile without warning!
If you see a deer – Do not approach it and back away slowly while avoiding eye contact with the animal as this can be interpreted as an act of aggression.
If you see another kind of wildlife – If it’s a bird or rodent, just wait for it to leave. If it’s a predator, then slowly back away while making yourself look as big as possible (spread your arms out).
If you see an animal eating another dead/injured creature – Do not get near them as they can become very hostile without warning
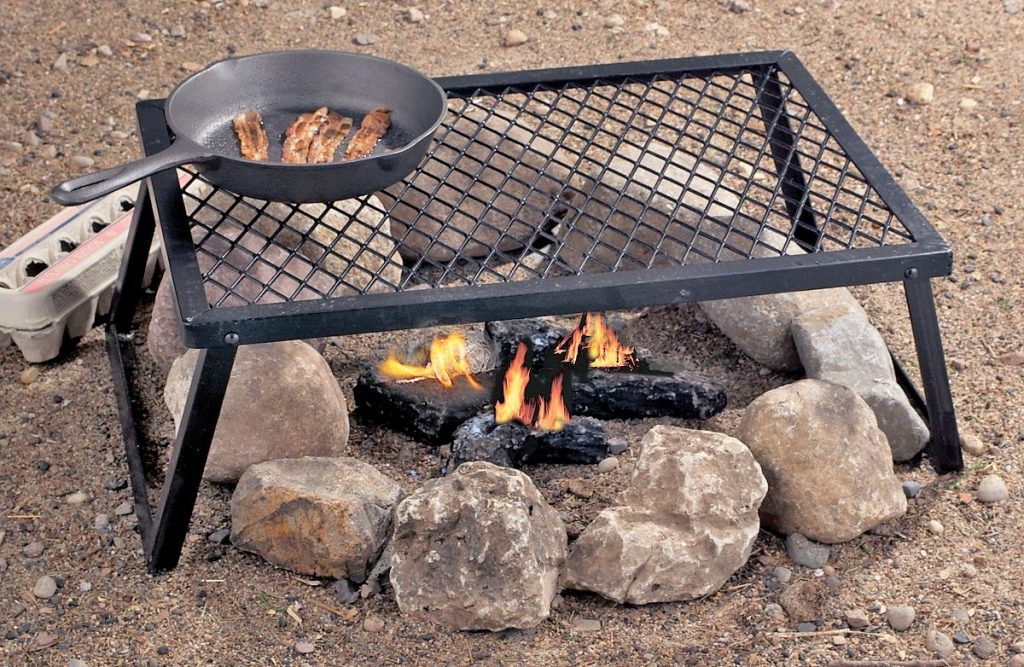
Safe Fire Practices
One of the best parts about hiking is being able to cook your food outside. Just make sure that you do it safely so you don’t start a forest fire. Here are some tips on how to keep yourself safe:
- Make sure there’s no debris around where you want to build your campfire and check if the area has any burn bans in place.
- Make sure to clear away all flammable materials from where you want your fire.
- Never leave your fire unattended.
- When cooking over a fire, always use nonflammable tools (e.g., metal grill)
- Be sure that there’s no wind and if possible, try to build your fire on rocks instead of the dirt/grass as this can catch on fire easily.
- Only use dry wood for your campfire and keep it small (don’t burn any green or wet material). Make sure you put out all fires before leaving as they can cause a forest fire if they’re not completely put out.
- Keep your firewood in a dry area away from the campfire.
For how to build a fire safely, please refer to this blog post
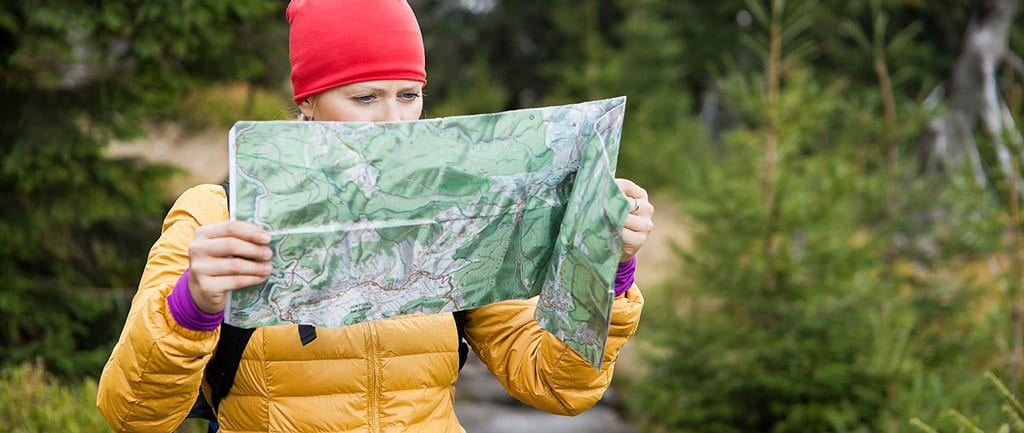
Map
Make sure that you know how to read a map before embarking on your hiking trip.
Here are some tips for doing so:
- Be aware of what scale the map is in (e.g., if it’s an inch=mile, make sure to use your measurements accordingly)
- Learn how to orient yourself with different landmarks and how to use the map correctly.
- Be sure that you know what features mean (e.g., roads, trails, and major landmarks).
Note: If you’re lost, don’t panic. You can always head back to where you started from or look for a landmark so long as it’s safe to do so.
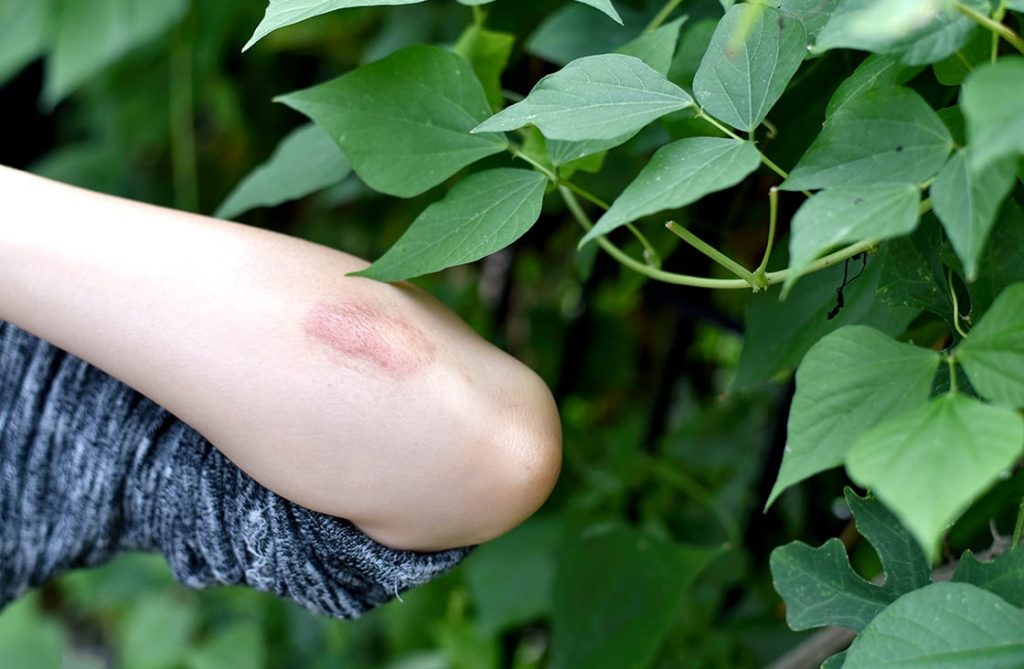
Poison Plants
Hiking in the wilderness is very rewarding, but it’s also important to know what plants are poisonous.
Here are some of them:
- Rhododendron/Azalea – This plant emits a toxic substance that can cause skin irritation if touched
- Poison Ivy/Oak/Sumac – These three types of poison ivy cause skin irritation and rashes when touched.
- Hemlock – If ingested, this plant can cause respiratory failure and death.
- Mushrooms – Never eat any mushrooms that you find as some of them are poisonous! Make sure to consult a guidebook before consuming anything.
- Oleander – This flower emits a toxic substance that can be very harmful to people (even deadly in some cases).
If you come across these plants, make sure not to touch them. Here’s what to do if you find yourself being exposed to poison ivy/oak/sumac:
- Scrape off the affected area with a blade or knife.
- Wash it thoroughly under cold water.
- Apply rubbing alcohol to help dry up any liquid that’s emitting from your skin (this prevents infection).
- Cover with an anti-itch cream/lotion if possible.
FAQ
Q.Is it dangerous to backpack alone?
A.While you can certainly go out on your own, hiking is an activity that’s best done with another person. That being said, if you’re going to do so then make sure that they know what they’re doing and are capable of handling whatever situation may come up while also bringing the necessary gear along.
Q.What makes a good hiking guide?
A.In general, you should look for someone who’s been doing it long enough to know the ins and outs of safety along with having a well-rounded understanding of what they’re teaching you about (e.g., knowing how to read maps). In terms of equipment/gear, they should have everything they need to ensure that you’ll come back safe and sound.
Q.How long should a break last?
A.When you’re hiking, it’s important to take breaks when you need them, and for how long will depend on what kind of shape you’re in as well as the type of terrain that you have ahead of you. On average though, most people recommend taking short breaks every 20-30 minutes.
Q.How do I deal with blisters?
A.The best way to treat a blister is by keeping it clean and dry so that the skin around it can heal properly while also using an antiseptic ointment or spray on your feet before you start hiking in order to minimize friction between them and your shoes/socks.
To help prevent blisters from forming, make sure to wear proper hiking gear and keep your feet dry as much as possible. If you do get a blister though, don’t pop it as this can create an entry point for bacteria which will lead to infection.
Be sure that the skin around the blister is intact before popping it open so that you can drain it safely. Then, cover the open wound with a sterile bandage and apply antibiotic ointment on top of that to prevent infection.
Q.How should I pack my backpack?
A.When packing your bag for hiking, make sure to keep things light as heavy items will slow you down while also taking up more space. Here are some things to keep in mind when packing:
Pack the heaviest items closest to your back so that you can distribute weight evenly
Only bring what’s necessary and leave behind extra gear if they’re heavy While hiking, always make sure it’s balanced on both sides of your backpack as this will ensure maximum comfort for yourself.
Q.How do I deal with poison ivy?
A.Here are some tips for what you can do to avoid poison ivy:
Wear long sleeves and pants when hiking through wooded areas
If you think you’ve come into contact with it, wash yourself up right away as this will help prevent the oil from spreading. Make sure that you use a mild soap for doing so since regular ones can irritate your skin even more which will cause it to spread.
Afterward, you can apply calamine lotion or hydrocortisone cream in order to help soothe the skin and dry up any blisters that may have formed due to your exposure.
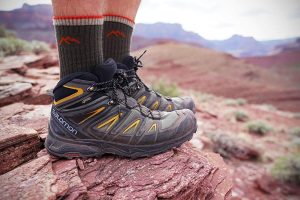
Q: What are the best shoes for hiking?
A: Try to find ones that have excellent grip, support and are waterproof. They should be comfortable enough so you can walk in them all day if needed but they must not be too tight or it will cause discomfort after a while.
For example, here’s an article which talks about some good hiking shoes
for beginners.
Q: What are some common injuries that can happen when hiking?
A: They include cuts and bruises, muscle cramps (usually in the calves/feet), twisted or sprained ankles, bites from wildlife (e.g., snakes) etc. Note : If you get bitten by an animal, always seek medical attention as soon as possible!
Q: Are there any safety precautions I should take when hiking?
A: Yes. Make sure you’re not carrying anything that can smell (e.g., food). Also, be aware of your surroundings and take necessary precautions if you come across wildlife. This will ensure that you’re safe while having fun.
Q: What are some good resources for hiking?
A: There’s the National Park Service which has great information on trails around the country. Also, this blog post has some great tips on how to stay safe while hiking in the wild!
Q: What are the best trails for beginners?
A: It depends but most of them will have easy-to-navigate paths and won’t be too strenuous (e.g., steep hills, etc.). Try to find ones that are around a mile to start with and then gradually increase the length as you get better.