Known as the most reliable and efficient form of transportation, bikes are a great way to get around. But if your bike doesn’t have the proper care and maintenance, you may find yourself in need of a new one before too long. Whether you’ve just bought your first bike or you’re an avid cyclist, this guide will teach you how to keep your bike in perfect condition.

Table of Contents
Basic Bike Maintenance Tools to Keep Your Bike in Great Condition
In order to properly maintain your bike, you will need a few basic essentials. In addition to the tools that come with most bikes as well as any accessories or bells and whistles, these items belong in every cyclist’s toolbox:
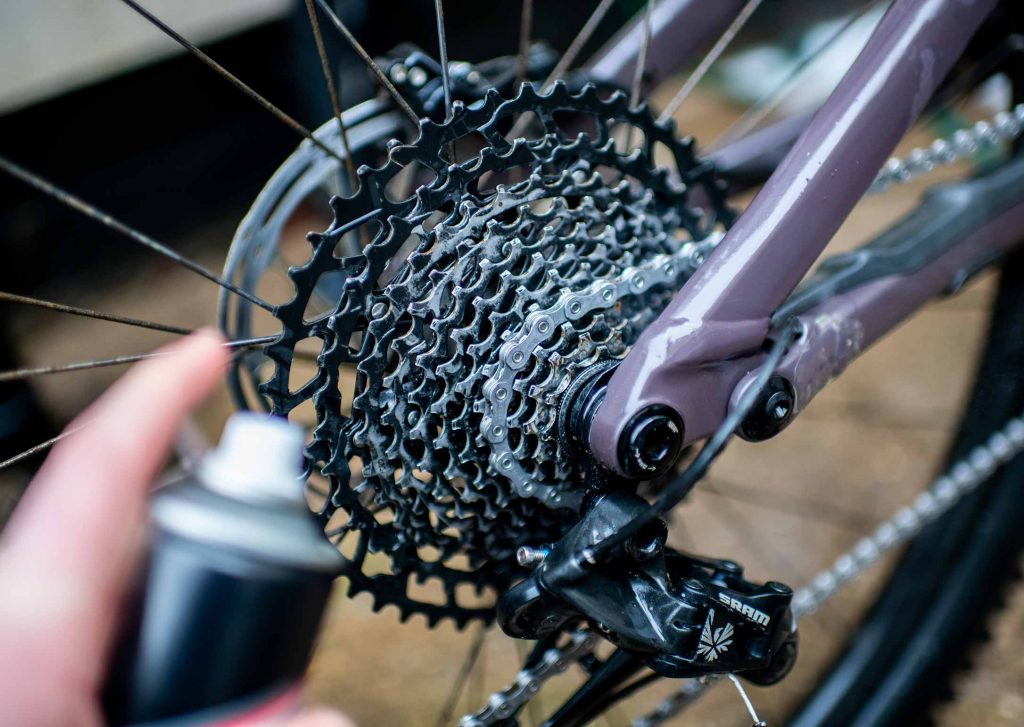
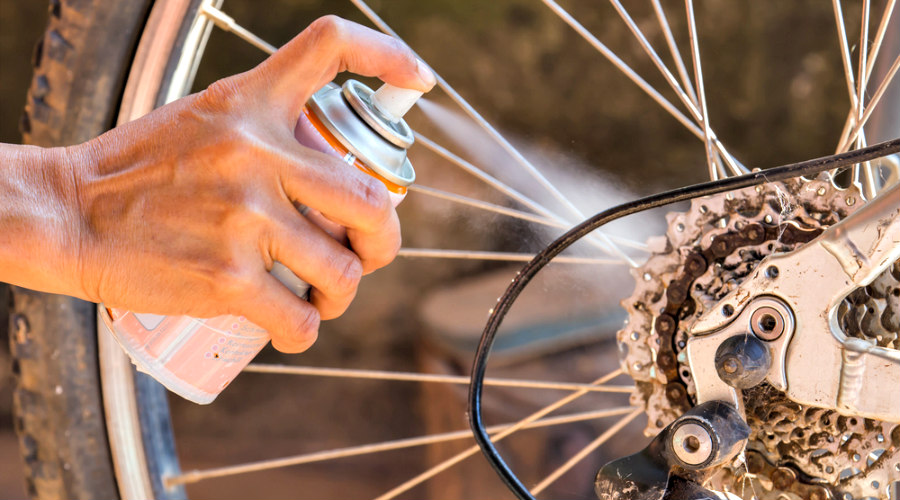
- Chain Lubricant: This lubricating spray will make your ride smoother and quieter as it keeps your chain from becoming dry and rusty.
- Clean Rags: You’ll need these to clean off any debris or dirt that builds up on your bike throughout the day. Keeping a clean bike will help you avoid rusting, keep other components working optimally, and prevent injuries caused by falling due to poor visibility.
- Bike Multi-Tool: This portable tool includes all the most important bike tools in one compact device.
- Spare Tube: You never know when you might get a flat tire, but having an extra tube around is always helpful
- Patch Kit with Tire Levers: These patches will help fix any holes or tears that may pop up on your inner tubes. If they don’t work, you’ll need the tire levers to get your inner tube out of harm’s way before applying a new patch.
- Bike Lock: Make sure that no one is able to ride off with your bike while you’re not looking! A sturdy lock will help keep thieves away.
- Pump: This tool will help you inflate your tires before every ride. You’ll save time, money, and energy by not having to stop at the gas station each time
- Spare Bolts: It’s always a good idea to carry around extra screws in case you lose any of them along the way. This ensures that your bike stays safe so you’re not stranded with a loose bolt.
- Rubber Gloves: Although this may seem like an odd item to put on the list, many people find that rubber gloves help keep their hands clean during bike maintenance tasks and provide protection against any grime or oil they might come into contact with while repairing various components of the bicycle.
Tools for Advanced Bike Maintenance and Repair
If you want to take your bike care routine one step further, make sure that you have these tools on hand:
- Cable Cutters and Wire Strippers: These will let you cut and strip the cable casing around the cables in order to reach their inner components. You’ll need this if any of those parts break or malfunction due to wear and tear.
- Spoke Wrench: This wrench will help you take apart and adjust your front wheel if necessary.
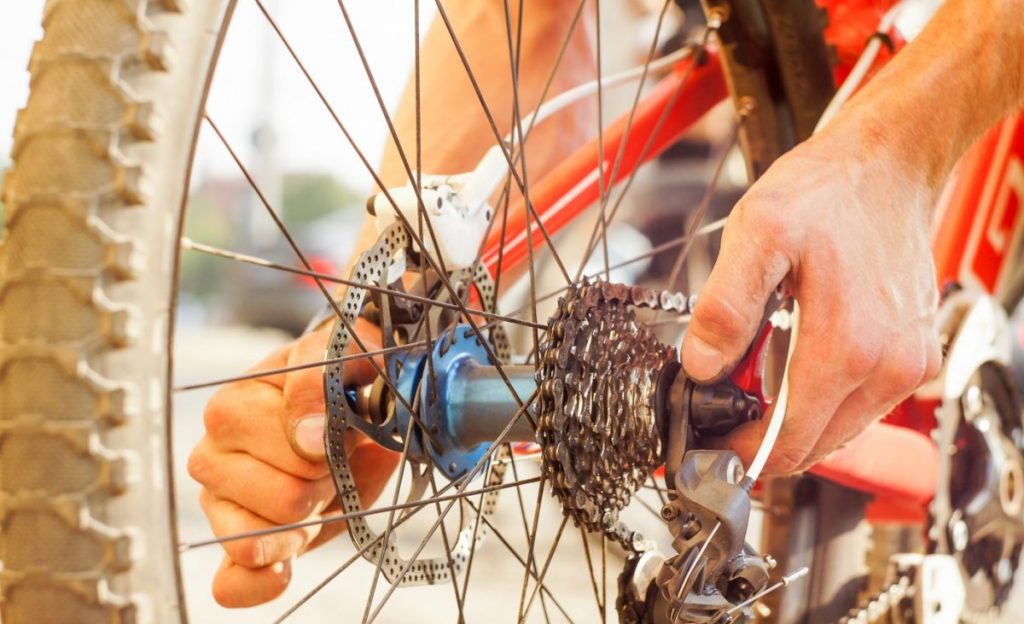
- Cassette Tool: If the cassette on your back wheel wears out or becomes damaged, this tool can quickly replace it so that you don’t have to take your bike to a mechanic.
- Headset Wrench: This tool is helpful for tightening and adjusting the headset on any type of bicycle so that you avoid any wobbling or creaking.

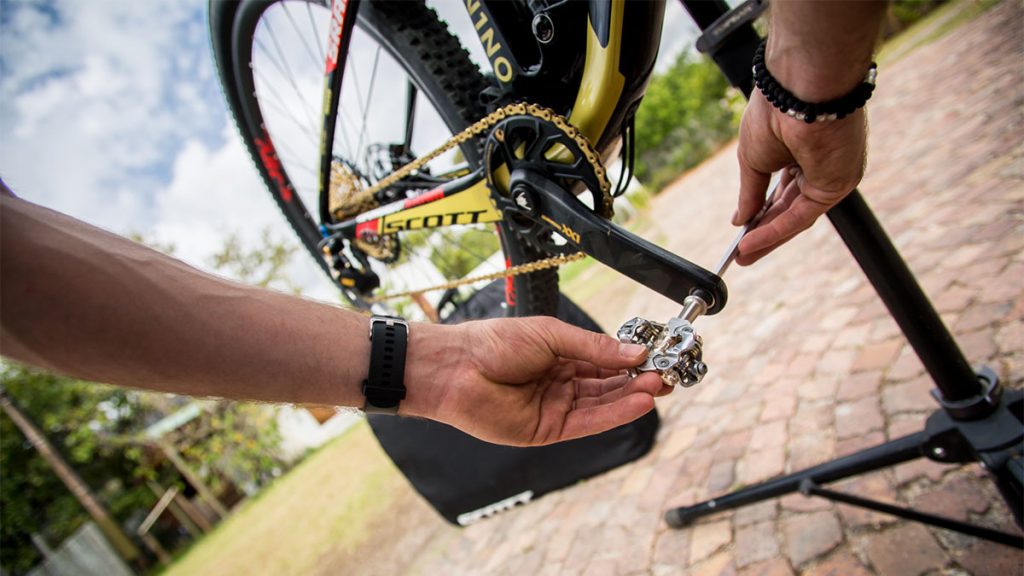
- Pedal Wrench: You’ll need this tool to remove and tighten your pedals if they become loose or fall off.
- Bike Stand: A bike stand will keep your bike upright while you work on it so that you can focus all of your
- Chain Whip: Use this link remover to break chains in order to remove broken parts from bike components.
- Bottom Bracket Tool: If your bottom bracket needs to be adjusted or replaced, this tool will let you do so without much hassle. It’s perfect for removing stubborn parts that won’t budge otherwise.
- Torque Wrench: This wrench is used in high torque situations where other wrenches can’t reach their full potential, making this tool perfect for tightening components to the proper specifications.
- Anti-Seize Compound: This compound is applied to any moving parts so that they don’t seize up or freeze in place. It will help keep your bike running smoothly for longer.
- Bearing Grease: This grease is applied to any moving parts that require a little extra lubrication. It will help keep your bike running smoothly for longer
Keeping your Bike Clean
In order to help your bike maintain its top-notch performance, keep it clean and free of dirt and grime.
- Degreasing Agent: A degreasing agent will help remove any gunk from your bike and keep it running smoothly.
- Bike Wash: Bike washes can be used to scrub down your bike and remove any leftover grime. This is a great way to start fresh for the new biking season or just to keep your bike in good condition.
- Lubricating Oil: Lubricating your bike parts with oil will help them run smoothly and avoid any damage or wear.
- Wax Polish: Wax polish can be used to bring your bike’s shine back and make it look like new.
Regularly Bike Check-ups
To ensure that your bike is always ready to go, make a habit of doing regular check-ups before each ride.
- Regularly check your bike pressure and make sure your tires are fully inflated.
- Check your brakes and make sure they work well.
- Examine the frame for any damage or wear so that you can replace parts before they become a problem.
- If you find any damage, make a list of the parts that need to be replaced and take your bike in for repair or replacement.
- Check over your nuts and bolts to make sure they’re tight.
- Check your handlebars and stem for any loose screws, damage, or wear in order to avoid malfunctions later on.
- Check your shifters and make sure they’re in working order.
- Check that the cables are intact, tight, and not frayed.
Note: If you’re not sure how to fix any of these problems, take your bike in for service.
Bike Parts That May Suffer From Wear and Tear
If your bike is subjected to a lot of wear and tear, there are certain components that may suffer from malfunction or damage.
- Bike brakes: The brake pads and the rim of your wheel may suffer from wear and tear after a lot of use.
- Chain: Chains may require replacement after excessive use or damage caused by rust.
- Bike tires: Tires can become flat if they aren’t properly inflated, so make sure that you check them regularly.
- Handlebar tape: Worn or frayed handlebar tape can change the way your brakes work and damage your handlebars.
- Handlebar: The handlebar can become loose over time, so check it regularly to avoid malfunctions.
- Spokes: Spoke damage can cause the wheel to wobble, which is dangerous when
- Bike Pedals: Worn or damaged pedals will make it difficult for you to ride your bike, so replace them as soon as you notice any wear or damage.
- Bike Saddle: A damaged saddle can make riding uncomfortable, so keep an eye on it.
What to Avoid
There are certain things that you should try to avoid if possible.
- Don’t leave your bike outside, as this can cause rust and other damage.
- Don’t leave your bike in a garage for too long, as this can cause the parts to rust and the frame to become warped.
- Don’t ride without a helmet; this is one of the best ways to avoid injury.
- Don’t overfill your tires or inflate them too much, as this can cause the tires to burst.
- Don’t ride your bike when you have a flat tire, as this can cause damage to other parts of the bike.
- Don’t ride without a bike light, as this can make it difficult for other people to see you and avoid hitting you.
- Neve ride without a bike lock; this can make it easy for someone to steal your bike.
- Don’t ride through puddles, as this can cause damage to the cables.
- Don’t forget to check your tire pressure regularly, as this is key for safe riding.
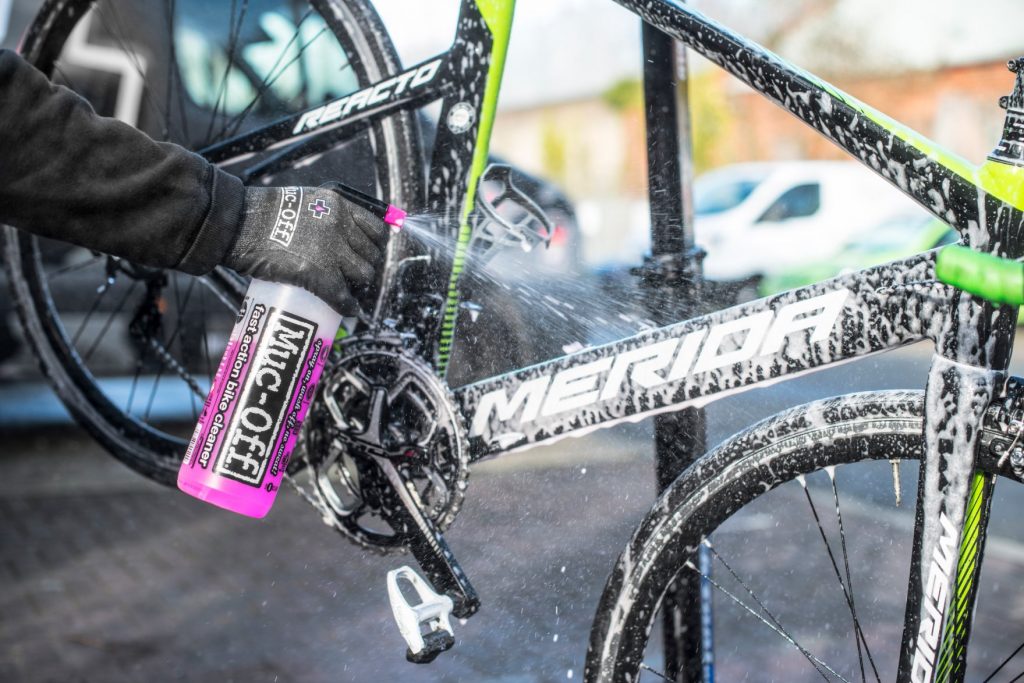
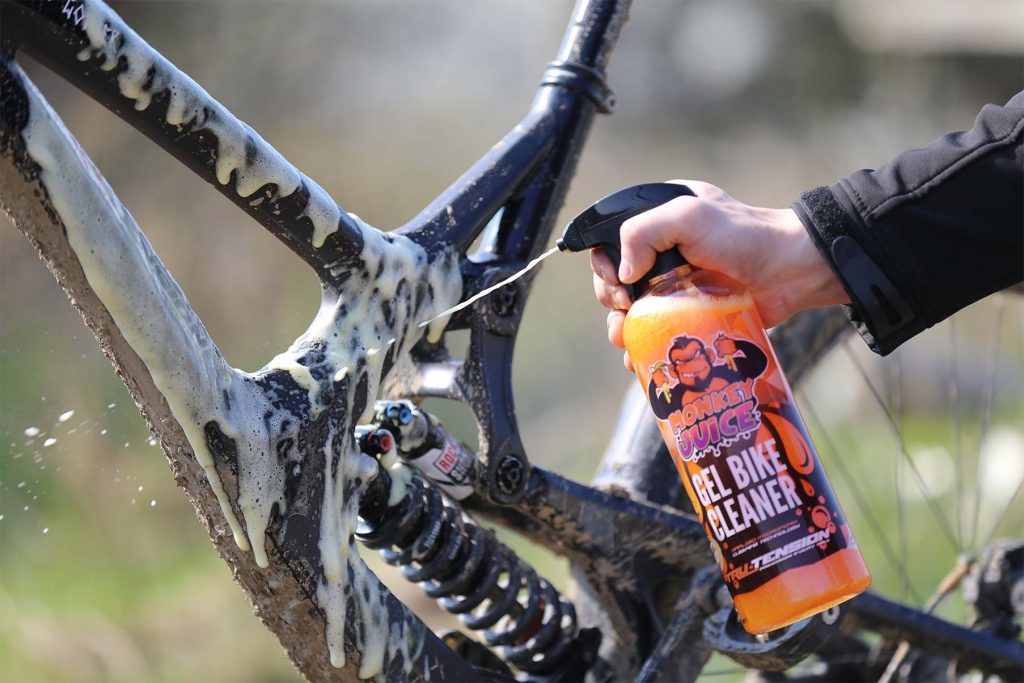
How to Wash Your Bike
If you want your bike to run smoothly and avoid rust, it’s important that you clean it regularly.
To clean your bike, you will need the following supplies:
- WD40 or other lubricating oil.
- Bucket of warm water.
- Bike cleaning brush.
- Mild dish soap (non-abrasive).
- Microfiber cloths or paper towels.
- Bike cleaner.
Steps to Clean Your Bike
Once you have all of the supplies that you need, follow these simple steps:
- Step one: Wipe your bike down with a dry microfiber cloth or paper towel to remove any large debris.
- Step two: Spray WD40, dish soap, and water over the entire bicycle in order to break up oil and grease buildup.
- Step three: Brush out all dirt from every part of the bike using a soft brush.
- Step four: Rinse and wipe down your bike to remove all soap residue.
- Step five: Wipe the entire bicycle with a dry microfiber cloth or paper towel in order to absorb excess moisture.
How To Wax Your Bike
If you want to protect your bike from rust and corrosion while also giving it a nice shine, then waxing is the way to go.
Supplies You’ll Need
- To wax your bike, you will need the following supplies:
- Bucket of warm water.
- Microfiber cloths or paper towels.
- Car wax with applicator sponge.
Steps to Wax Your Bike
Once you have all of the supplies that you need, follow these steps:
- Step one: Clean your bike thoroughly with the microfiber cloth or paper towel.
- Step two: Mix car wax and water in a bucket until you have created a paste-like consistency.
- Step three: Apply this mixture to your bike, making sure that it coats every inch of your bicycle. If there are any spots that are too difficult for you to reach, then ask someone else for help.
- Step four: Allow the wax to dry completely before riding your bike; this can take up to an hour or two depending on how much you used and the weather conditions outside.
- Step five: Once it is dry, buff off any excess wax using a microfiber cloth or paper towel and then ride your bike.
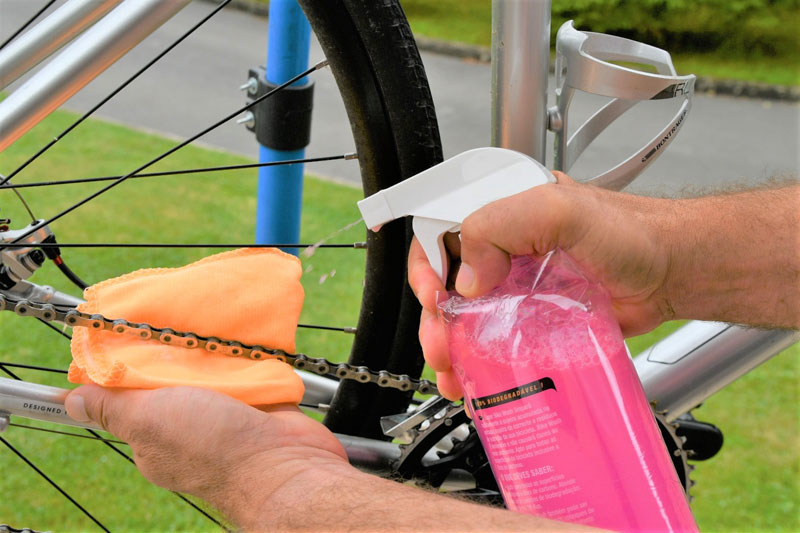
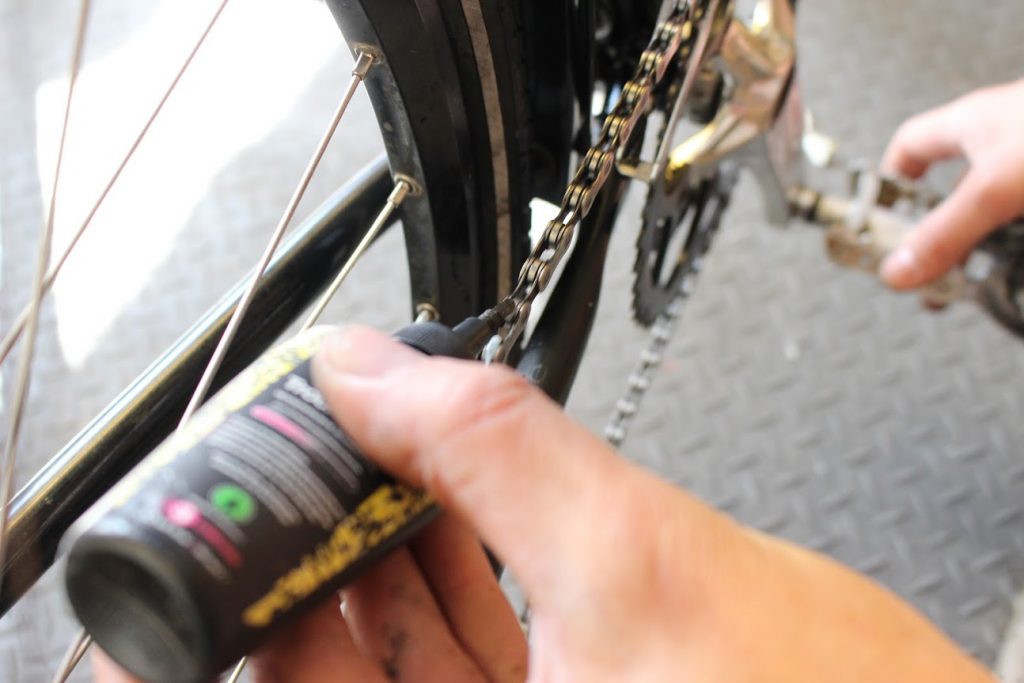
How to Clean Your Bike Chain
If your bike chain is dirty, then it’s going to affect how smoothly you are able to ride. To keep your bike running well and avoid malfunctioning because of a dirty chain, clean it regularly.
Supplies You’ll Need
To clean the chain on your bicycle, you will need the following supplies:
- Bucket of warm water with a drop of dish soap.
- Stiff bristled brush.
- Cleaning rag or paper towels.
Steps to Clean the Bike Chain
Once you have all of the supplies that you need, follow these steps:
- Step one: Place your bike in an upright position and set it on a flat surface.
- Step two: Mix water and dish soap in a bucket until you have created a soapy solution.
- Step three: Dip the brush into your mixture, making sure that it is not dripping wet but also has enough moisture to clean the chain well. You don’t want too much of the cleaning solution on the bike chain because it can make your bike slip.
- Step four: Brush the chain vigorously until you have removed all of the caked on dirt and grime from it.
- Step five: Rinse the brush in a bucket, making sure that no suds are left behind because they will attract more dirt to build up over time.
- Step six: Wipe the chain down with a rag or paper towel until it is completely dry.
- Step seven: Lubricate your bike’s chain using either an aerosol lubricant, spray wax, or basic oil (if you use regular motor oil on your bicycle then make sure that you only put three to four drops onto the chains of both your front and back gears).
- Step eight: Reinstall the chain to your bike.
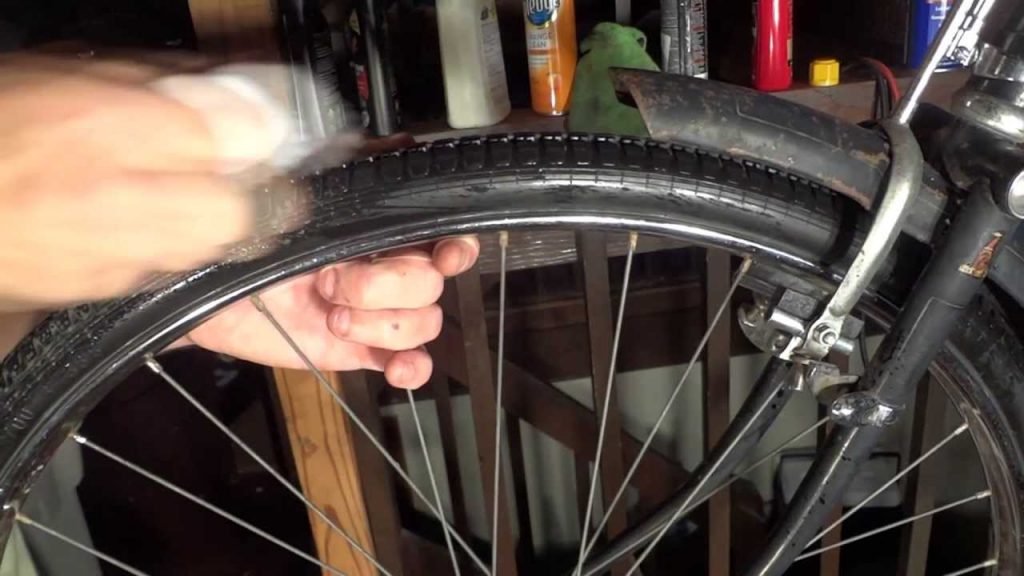
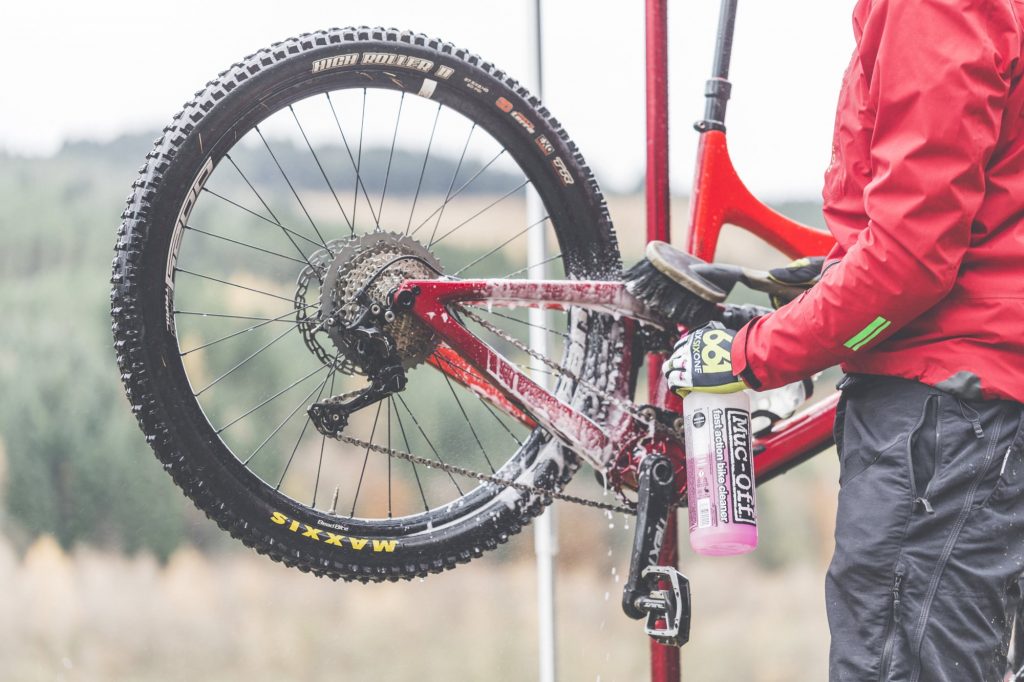
How To Clean Your Bike Tires
Your tires play a big role in how well you can ride your bicycle, and getting them dirty and caked with mud will affect their ability to grip the ground underneath them. If this happens, then it could cause you to fall off of your bike.
Supplies You’ll Need
To clean the tires on your bicycle, you will need the following supplies:
- Bucket or sink with warm water and a drop of dish soap mixed in it.
- Hose nozzle (if cleaning is taking place outside).
- Scrub brush (for scrubbing the bike tires clean).
Steps to Clean Your Bike’s Tires Outdoors
To clean your bicycle’s tires outdoors, follow these steps:
- Step one: Remove any excess dirt and mud from your bike with a stiff bristled brush. This will prevent you from scrubbing too hard on your tire rims because it can cause damage.
- Step two: Turn the hose nozzle onto a light setting and spray off your bike’s tires to remove any more dirt or mud from them.
- Step three: Pour warm water into a bucket or sink with soap mixed in it, making sure that you use enough of the cleaning solution so there is some suds left over after you have finished scrubbing the tires clean.
- Step four: Dip your scrub brush into this soapy water and use it to rub away any dirt on your bicycle’s tire rims that may still remain after you have used a hose nozzle to spray them off. Be careful not to be too rough or harsh with this step because you don’t want to damage your bike’s tires.
- Step five: Rinse the soapy water off of your bicycle’s tires with a hose nozzle, making sure that you get all of the soap rinsed away.
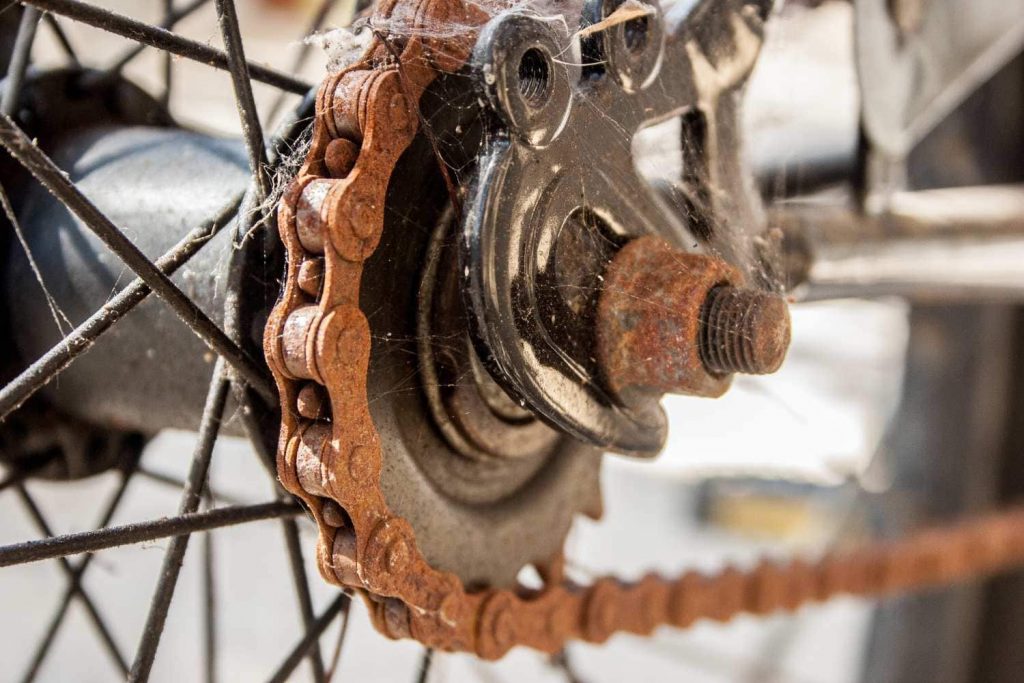
How To Clean a Rusty Bike
Rust can be a problem with bicycles that are left out in the elements frequently because of the wet conditions they come into contact with, like those who live near bodies of water. To remove rust and restore your bike’s smoothness and shine, follow these steps:
Supplies You’ll Need
To clean rusty spots off your bicycle frame and restore its smoothness and shine, you will need the following supplies:
- WD-40 (for removing rust from your bike’s metal parts).
- Sandpaper or a wire brush for scouring off tough spots of rust.
Steps to Remove Rust From Your Bicycle Frame Outdoors
To remove rust from your bicycle frame outdoors, follow these steps:
- Step one: Look for any rusty spots on your bike that have built up over time and then spray them with WD-40 to loosen their grip. Let it sit there without touching the metal parts of your frame or handlebars so they don’t get accidentally sprayed, as well.
- Step two: Use sandpaper or a wire brush to scour off any rust spots that are too tough for the WD-40 itself to remove. You can also use steel wool if you have some, which works well in removing rust without leaving behind scratch marks on your bike’s metal parts like sandpaper or a wire brush will do.
- Step three: Wipe away any remaining rust that is flaking off your bike’s metal parts with a clean rag.
- Step four: Rub WD-40 onto the metal parts of your bicycle frame again to prevent rust from reappearing and keep them smooth, shiny, and looking brand new.

How To Store Your Bike
Now that you have cleaned your bike, it is time to store it. This is important to ensure that rust doesn’t build up all over again. To store your bike, follow these steps:
- Step one: Cover the seat of your bicycle with a cloth cover so dust and other debris won’t get stuck onto it while you are storing it away.
- Step two: Put some plastic bags on its handlebars to protect them from turning white and getting damaged, as well.
- Step three: Store your bike in a cool dry place where it won’t get wet or be exposed to extreme heat or cold. A garage that is attached to the house is best for this purpose because of its temperature control. If you don’t have one available, try finding an out-of-the-way corner of your home where it won’t be disturbed and you can easily find it again when you want to ride.
- Step four: Hang up your bike by putting a nail into the wall, using hooks attached to brackets that are made for this purpose (which will not damage or scratch its frame), or finding another way to store it safely and securely upright.
Extra Tips: If you have a rust problem that keeps coming back on your bicycle, consider using an anti-rust spray to coat the metal parts of your bike before storing them away for any length of time so they don’t keep getting damaged by corrosive chemicals as WD-40 does.
How To Care For Your Bike’s Tires
Taking good care of your bike’s tires is essential to ensuring it rides well and doesn’t puncture easily. To care for your bike’s tires, follow these steps:
- Step one: Inspect the sidewalls of your bicycle’s tires to see if they are smooth and free from any cracks or damage. If you notice anything wrong with them, take it to a professional mechanic so they can fix it up quickly before something worse happens.
- Step two: Check your bike’s tire pressure with an air compressor or by using a handheld type that you can attach to the valves on each of your bicycle tires.
- Step three: Pump up any deflated areas you find until they are firm and do not give way when pressed down upon. Make sure all parts of your bike’s tire have equal amounts of air in them so it doesn’t veer to one side when you ride.
- Step four: Rotate your tires once a month or after every time you ride on bumpy surfaces, such as dirt trails and potholes, where they get worn down more quickly than usual. If the treads show any signs of wearing thin before this, rotate them more frequently and keep a close eye on them.
How To Fix A Flat Tire: Tubes vs. Patches
Fixing your bike’s flat tire can be done in two ways: by using tubes or patches, depending on the type of puncture you have to deal with. Here we will explain both methods so you know which one to use when you’re in a pinch.
- Step One: Remove the tire, tube and any object that is lodged within it by using your hands or an easy-out tool (only do this if the puncture isn’t too deep).
- Step two: Find where the hole is on your bike’s inner tube by holding it up to a light source.
- Step three: Add air back into the tube so you know where the hole is, then mark it with chalk or masking tape for easier identification later on.
- Step four: Put your tire back onto its rim by lining up all of its grooves and screwing it in tightly between your hands. Make sure the tube is placed evenly so it doesn’t shift to one side and get pinched under your tire when you ride.
- Step five: Add a bit of glue around your puncture mark, or wherever else you noticed holes on your bike’s inner tube during step two, then stick a patch over top of it and smooth out any air bubbles around it with your fingers, using a tool if necessary.
- Step six: Leave the glue to dry for ten minutes before putting your bike’s tire back on and pumping up its inner tube again to check that all of the patches are holding strong (if any fall off or don’t stick properly you will need to add more).
- Step seven: If you find that the puncture is too big to be patched, then replace your bike’s inner tube with a new one and repeat steps two-six.
Extra Tip: Don’t forget to check for any additional holes in the rim of your bicycle by using soapy water on it while its tire is fully deflated.
- Step eight: Put your bike’s tire back on by lining up all of its grooves and screwing it in tightly between your hands, making sure the tube is placed evenly so it doesn’t shift to one side and get pinched under your tire when you ride.
Extra Tip: Make sure that your tires are inflated properly to the psi (pounds per square inch) that your bike’s manual specifies. This will ensure you’re riding comfortably and not putting too much strain on your tires, making them susceptible to punctures.
Step nine: Pump air back into each of your tire’s sections so it has an even amount in all parts of it before you ride off on your bicycle again.
FAQ
Q. What type of air compressor should I use?
A. A cordless one is best, but if you don’t have access to that then a handheld hand pump will do fine as long as it can reach your bicycle’s valve stems easily enough.
Q. What is the best way to maintain my bike?
A. There are three main things you need to remember when caring for your bicycle: check over it regularly, clean it out properly and rotate its tires every month or so if they get worn down too much on certain surfaces.
Q. How do I fix a flat tire?
A. There are two ways you can do it: by using patches or tubes. If the puncture is small enough to be patched, then follow steps two-six above. For anything bigger than that, replace your bike’s inner tube instead and repeat steps two-seven.
Q. What should I look out for when rotating my tires?
A. Look for puncture marks and wear down on the treads to see if they need rotating more frequently than usual, or replacing altogether. If you find any signs of this before your bike’s manual states it should be done (usually every month), then do so sooner rather than later.
Q.How do I know when my tire is properly inflated?
A: The best way to determine if your bike’s tires are filled with the right amount of air pressure is by using a hand-held pump that attaches to each valve on your bicycle, or an air compressor.
Extra Tip: If you’re working with just one section of your bike’s tire, make sure you do it with the rest of its sections as well so your ride is even and balanced.
Q: Can I use a different type of glue other than those made specifically for bike tubes?
A: Yes, you can as long as it is approved by the manufacturer and does not contain any acid or harsh chemicals that can damage your inner tube’s rubber.
Q: How do I know if there is another puncture in the tube if I can’t see it?
A: If your bike’s inner tube has multiple holes that you cannot find, inflate its tire then submerge your bike’s tubes underwater. This will make any additional leaks easier to spot by watching for bubbles rising up from them.
Q: Is there another way to find the source of a puncture if I cannot see it?
A: You can add some food coloring or soap to your bike’s tube and track where it is leaking from by following the colored liquid.